Share This Page
| Home | | Computer Graphics | | Adventures in Ray Tracing | | | | Share This Page |

Now we will create a scene description file and use it to render an image. Because I don't know what operating system you are using or what modeling software you have set up (if any), this specific example will use a plain-text POV-ray scene description file, and POV-Ray itself, invoked from a shell, to do the rendering. Choose your favorite plain-text editor to create and edit the scene description file. On Linux I recommend KWrite, which has the advantage of knowing about POV-Ray's file format and will pleasantly syntax-color your entries. By the way, I am using KWrite's HTML export feature to create the syntax-colored POV-Ray examples on this page. This example is designed to be the simplest possible POV-Ray scene description. Here is our description:The astute reader will notice something different about this listing, one not covered before: there is a translate entry with a new syntax:
If you copy the code block above into a text editor (or click here to display the POV file), then save it as "example.pov", then run POV-Ray and provide this file name, POV-Ray will render the image. By the way, here is how to invoke POV-Ray from the command line:
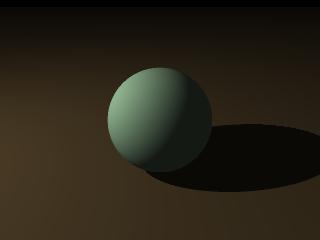
Click this image to see the change
described in the textThe dollar sign at the left is supposed to represent a typical Linux command shell prompt, you do not type this character. It is just present to remind you of the context, that of a command shell. Here is a more elaborate invocation of POV-Ray:$ povray filename.povThis example means "create a graphic 640x480 (+W640 +H480) in size, and render using antialiasing (+A)." To see a list of all POV-Ray's command-line options, type:$ povray +W640 +H480 +A filename.povNow, because this exercise is meant to make you comfortable editing a POV-Ray scene description, let's change something and re-render to see the difference. Let's change this:$ povray -hto this:translate y*1And render the scene again. Notice that, if you have entered the change correctly, the sphere has moved upward. Click the image on this page to see the change you should expect to get.translate y*2
| Home | | Computer Graphics | | Adventures in Ray Tracing | | | | Share This Page |