

 Share This Page
| Home | | Android | | | | Share This Page |
An Android-based multi-protocol server
Copyright © 2020, Paul Lutus — Message Page
Current SSHelper Version: date
Most recent update to this page:
|
"Let's move that data!" |
 SSHelper on a small screen. (Click the image to see a larger display.) |
Loyal users, SSHelper is going away — not because of issues with SShelper, but because of changes in Android from version 10 and newer. Over the next few years, in a future Android version past 10, SSHelper will likely stop functioning entirely. SSHelper version 13.2 (available on this page) will probably be the last version, simply because future Android versions will not allow it to run.
Here's a recent conversation with a user that explains the changes:
Last SSHelper Version
The Program
- SSHelper is an advanced, multi-protocol, secure server for the Android platform.
- SSHelper requires Android version 5.0, API 21, or newer.
- SSHelper works just fine with a normal, unrooted Android device — i.e. your device.
- SSHelper works as an application and as a service. As a service it runs in the background, providing secure communications protocols without requiring user attention.
- SSHelper supports interactive Secure Shell (hereafter SSH) sessions and various kinds of transfers including scp, sftp, and rsync, on all common platforms:
- On Windows, SSHelper works with WinSCP, PuTTY and similar programs.
- On Linux, apart from normal SSH shell session activities, SSHelper can be used directly with file browsers for seamless filesystem browsing and transfers by specifying the "sftp:" protocol.
- On the Mac, SSHelper works with Cyberduck and similar programs.
- SSHelper announces its services on your local network by way of Zeroconf/Bonjour, a simple and efficient way to configure, and communicate within, a network.
- SSHelper hosts an activity log Web server that gives a remote view of the activity log — useful for administration and development.
- SSHelper also hosts a clipboard access Web server that provides read/write access to the Android clipboard from any browser on the local network.
- SSHelper is free, open-source and there are no ads. It's licensed under the GPL and the source is freely available.
The Programmer
Hello — I'm Paul Lutus, author of SSHelper. I've been writing software for about 35 years and have written some very well-known titles (Apple Writer, Arachnophilia). SSHelper is my first Android application — I wrote it simply because there were no Android programs that could give me what I needed. Existing programs were missing features and protocols, primarily support for rsync, a very efficient way to synchronize two directory trees.
I hope you like SSHelper. And stay tuned — I'll be writing more Android programs in the future.
I'll start with the simplest instructions, then in a later section I'll provide details for those who want them.
Getting SSHelper
Here are some easy ways to get SSHelper:
- The simplest and preferred method: get SSHelper at the Google Play Store. (I control my own Website, my downloads are reliable, but it's a good idea to avoid downloads that don't emanante from the Play Store. This is an example of a rule in life that ought to be followed consistently, regardless of apparently safe exceptions.)
- At the top of this page is a QR code (the box with the pattern) that can be used to transfer SSHelper directly to your camera-equipped Android device by way of a QR code reader (on many units with a camera, Android comes with a QR code reader). Read the code with your Android device's camera and QR software, download the SSHelper installation file and install it.
- Second option. Below the QR code is a download link to the SSHelper installation file (and
here is that link again). This approach only works if you're browsing this page with your Android device. Click the link and, as above, download the SSHelper file and install it.
Setting Up
- When you run SSHelper the first time, it installs itself, its supporting programs (OpenSSH, Busybox, Rsync and others) and creates a directory structure to support its activities.
- When SSHelper is done installing itself, it will automatically start its Secure Shell server on port 2222, the default port for non-rooted Android devices using Secure Shell (SSH).
- To verify that SSHelper has started normally:
- Look at the top of the display and check the appearance of the status LEDs:
These LEDs show that the Secure Shell server started successfully and there is an active wireless connection. Contrast this with the session shown in the graphic at the top of the page, where no wireless connection is available (because it's not a real device, it's an Android development emulator).Server
- Touch the
Activities icon and see if there are log entries that look more or less like this:
This also indicates normal operation.2011-10-31 20:31:22 sshd: Server listening on 0.0.0.0 port 2222- The next step is to get your device's IP address. Touch the
Configuration icon and make note of the "Server Address". You will need this address to connect with your device.
Making First Contact
For this step, you will need to have:
- The server's address (see above), which is a four-part number that looks more or less like this:
192.168.1.132.- A laptop or desktop machine able to connect with your Android device using a wireless connection.
- A suitable SSH client program for your platform. I have listed some possibilities above, in a range between full-fledged file browsers that understand SSH, to simple command-line programs for less exotic interactions.
- Let's get started. Let's say I have SSHelper running on my Motorola Xoom. By clicking the
Here is how to connect to your Android device using WinSCP on Windows:
- For this example we move to a Windows machine and run WinSCP, a popular SSH client program for Windows.
- When it runs, WinSCP asks for a host name. Your Android isn't likely to have a host name on your local network, so instead type in the IP address you acquired from SSHelper above.
- Next, WinSCP wants to know a port number. Type in 2222.
- For "User name", type anything, it doesn't matter, but type in something.
- For "Password", type "admin", the default SSHelper password.
- Skip "Private key file" for now.
- For file protocol, choose "SFTP" if it isn't already selected. This is one of the many protocols SSHelper recognizes.
- Now click "Login".
- WinSCP will show a dialog warning about connecting to an unknown server. Click "Yes."
- WinSCP will then show a login banner that originates with SSHelper — this is a convenient way for you to be reasonably sure you're connected to the SSHelper server. Click "Continue".
- Next, if you installed WinSCP with the Commander interface option (recommended), you will see a two-pane window with your local file system listed on the left and the Android/SSHelper filesystem listed on the right.
- Now skip ahead to "Here's how to navigate on all platforms" below.
Here is how to connect to your Android device from a Linux desktop:
- Open a file browser — Dolphin (KDE) or Nautilus (Gnome):
- On the Dolphin file browser (KDE), to make an address bar visible, click next to the folder located above the main data window (the flyout text will be "Click to Edit Location") and type "sftp://(ip address):2222". A typical entry might be "sftp://192.168.0.24:2222", but using the address your acquired earlier.
- On the Nautilus browser (Gnome), choose menu item "Go" ... "Location" and type "sftp://(ip address):2222", just as above.
- On both the Dolphin and Nautilus file browsers, you are next asked for a username and password — enter anything for the user name, and "admin" for a password.
- Contrary to what is said below, the Nautilus browser won't go to the SSHelper Home Page, instead it will most likely go to the Android root directory. If this is your experience, simply click the "/sdcard" directory to get back on track with the examples to follow.
- A hint for you sophisticated Linux users: to avoid having to repeatedly type in the nonstandard "2222" port, create a file named "config" under your home page .ssh directory with this content:
After you have created this configuration file, you will be able to gain access to your android device in the default way: "sftp://(IP address)" or, from a shell, "ssh (IP address)".host (IP address) port 2222Here's how to navigate on all platforms:
- When you first make contact, SSHelper shows its home directory (with the exception noted above), which on your Android device is
/data/data/com.arachnoid.sshelper/home.- But because of how Android deals with security issues, when you are using your Android device directly, you are a different user and your home directory is (most likely) /sdcard, where your e-books, music and other resources are located. Therefore most of your SSHelper activities will be with respect to the /sdcard directory.
- To go to that that directory from the SSHelper Home Page, click the "SDCard" link that is provided in the home directory.
- If the above action was successful, you will be in the most useful location on your Android device. It's where you store your own media — downloaded videos, books, music. For example, the directory named "eBooks" contains any e-books you may have acquired, or that came with the device.
At this point, the reader will be able to transfer large amounts of data to and from the Android device — synchronize directories, explore the Android file system, and many other things. This completes the basic introduction to SSHelper.
This section is a detailed list of SSHelper's features. On the SSHelper display is a row of tabs:
SSHelper also has an option menu (on devices with large displays, the menu items are sometimes all visible on the action bar):
The activity tab contains a log display of SSHelper's actions and states. It is a very useful way to analyze problems and to monitor user interactions. SSHelper also creates and serves a Web page containing this log information, details below. The log's contents and level of detail are controlled by the "select data logging mode" control on the configuration tab described below.
To set log display options and copy the log's contents to the system clipboard, long press the display.
The configuration tab contains a list of user-selectable options and data entry fields:
Item Description Server Address This field is predefined. It contains the address your Android device was assigned by the network. Later, we will discuss methods to make this a permanent, unchanging address for convenience in making contact with the device from your local network. SSH Server Port Number This is part of the network protocol used in communicating with your device. For a non-rooted Android device, only port numbers above 1024 are allowed. The classical SSH port number of 22 is not assignable without rooting your phone, which I don't generally recommend.
The fact that one may not assign the classic SSH port of 22 seems like an annoyance, because one must specify a port when making contact. But as it happens, there is a way to tell your computer to do this automatically — details below.
To change the port number, touch the port number entry field and a soft keyboard will appear to accept your entry. You will need to restart the server to enable this change.Log Server Port Number This is the port number for the activity log Web server. For reasons given above, unrooted Android devices must use numbers above 1024. The default value is 8080.
To change the port number, touch the port number entry field and a soft keyboard will appear to accept your entry. You will need to restart the server to enable this change.Clipboard Server Port Number This is the port number for the clipboard Web server. For reasons given above, unrooted Android devices must use numbers above 1024. The default value is 8081.
To change the port number, touch the port number entry field and a soft keyboard will appear to accept your entry. You will need to restart the server to enable this change.Server Password This is the password you use to contact your Android device. The default is "admin".
As it turns out, the best and most secure way to set up SSHelper is to arrange a no-password configuration. In that configuration, you're automatically logged on without having to enter a password, but ironically it is more secure than allowing password entries. The full details are below.Disable password logins This option allows you to prevent attempts to log onto your Android device using a password. It's part of a more secure scheme in which SSH keys are exchanged between server and client to allow automatic secure login, then, since there is no more need to enter a password, the option is disabled to prevent third party attempts to guess your password. Full details below. Enable strict modes This option increases or decreases strictness about checking file and directory permissions — checks that might prevent public-key logins from working. If disabled it allows imperfectly configured client machines to have successful public-key (passwordless) logins. Allow port forwards from any host This option simplifies certain transactions that involve more than one network hop. Run SSHelper service at boot This option automatically runs the SSHelper service when you turn on your Android device. This means you can log onto the SSHelper server as described above, but there is no activity running, which saves system resources and simplifies access to SSHelper, once you have chosen and tested the options you need. Check Network connectivity This option allows SSHelper to periodically check for the presence of a network connection. The results are shown by one of the status labels described earlier. Display IPV6 Addresses This option displays IPV6 rather than IPV4 network addresses. Enable FIle Writing Recent Android versions default to denying applications the ability to write fles to the device's internal storage. This option detects the present file writing permission and, if this SSHelper preference differs, launches a dialog to let the user change the Android permission setting. Enable Zeroconf broadcast This option allows SSHelper to announce its services on your local network using Zeroconf/Bonjour, an efficient way to communicate information within a local network. It also allows you to access your device on the local network using "(device name).local" instead of needing to remember the device's IP address. Enable log display server This option enables a log display Web server that shows the SSHelper activity log. Enable clipboard access server This option enables a clipboard Web server that provides remote read/write access to the Android clipboard. Prevent standby while running On many Android devices, after a period of inactivity the device goes into standby mode, and this option prevents it. The result is faster network transactions, but this may not be as important as allowing your device to enter standby with reduced power consumption. I recommend that users test SSHelper both ways and make a choice on that basis. Select data logging mode This selector controls what appears in the activity log (and on the Web server output):
- SSH Server Normal
- SSH Server Debug
- LogCat Fatal
- LogCat Error
- LogCat Warn
- LogCat Info
- LogCat Debug
- LogCat Verbose
The first SSHerver log level shows top-level events like the server restarting. The second level provides additional information useful for analyzing network and other problems.
"LogCat" is the Android name for its system log, a collection of reports about essentially everything that happens on your device. For a short log display of important events, choose a level high on the list. For more detail, choose a level lower on the list.
Remember that all the described log displays are provided to the SSHelper HTTP server as well as the activity tab, and the Web server color-codes the log entries in the same way, ranked by importance (click here for an example). The Web server log list is substantially longer than the activity tab's list — the activity tab text display can't handle much text without slowing the system down.Allow voice messages This option allows SSHelper to use a synthesized voice to tell you what's going on. The voice synthesis feature is not available on all Android devices, but as time passes it's increasingly common. Some users may find the voice prompts annoying, so they can be disabled with this option. Show password This option displays the password entry in plain-text. There's nothing more frustrating than to choose a very secure password, only to find that it's nearly impossible to enter without typographical errors. Cancel/Undo (button) As the user makes configuration changes, the old configurations are saved and can be recalled. This is a way to recover from bad or erroneous choices. Defaults (button) This option resets all the SSHelper options to their defaults. This is a way to recover from bad or erroneous configuration entries. Restart server with new values (button) This option makes the SSHelper server restart using the new choices. Many option entries do this automatically, but not all. This is simply a way to be sure that your choices have taken effect. This option works for most configuration choices, but a password change requires the user to also activate the menu item "Stop Server and Quit" for the change to take effect. Terminal
The terminal feature opens a shell session with your device. This feature isn't particularly easy to use, for a number of reasons. One is that the Android soft keyboard is missing a number of keys that are regarded as essential for shell sessions, like escape, control keys, and arrow keys. Instead of trying to use this terminal feature with the Android soft keyboard, I strongly recommend that users either use a Bluetooth keyboard with a full set of keys, or open a Secure Shell session from a desktop or laptop computer where all the shell session features one expects from a modern shell will be functional — history, line editing, color-coded directory listings, and so forth.
In recent SSHelper versions the terminal emulator is somewhat improved, but a networked shell session is still a much better choice. To see the terminal's options and control it, long-press the terminal display to show a dialog. The emulator is still crippled when using the Android soft keyboard, but when used with an external Bluetooth keyboard it's an almost-normal shell session (i.e. with history and line editing features).
The terminal feature can be used to recover from certain problems where local access is required, for example an orphan server process that's blocking the default port, but one that cannot be stopped by the usual remedy of restarting the server by touching the restart menu icon. In this case, typing "killall sshd" in the terminal emulator may solve the problem.
If you must use this terminal and need to start a Secure Shell session with a networked machine, the default invocation won't work — you must do it this way:ssh -tt user@machineThe "-tt" argument circumvents the fact that this terminal is not a real TTY and would ordinarily be prevented from acting as one. Without this special invocation, a session can be started but there's no prompt or entered character printing.
Again, this is just a convenience, not a real terminal, and there are any number of better choices for a shell session.
Home/Help
This tab opens a Web browser and loads this page — the SSHelper Home Page. This option allows the user to read the instructions while configuring SSHelper. It also uses substantial system resources, noticeable on smaller Android devices. So if this option makes your Android device suddenly slow down, you may want to avoid it.
Keyboard
In some contexts you will need a keyboard to make an entry but the soft keyboard won't appear automatically. This option makes the keyboard appear.Restart
This option restarts the SSHelper server. Touching the status LEDs also has this effect. Restarting the SSHelper server logs off any ongoing shell sessions and transactions, so it should be used only when necessary. (On some Android devices this option appears at the top of the display as an icon instead of a menu item.)Stop & Quit
This option stops the SSHelper login server and exits the program. As is normal for Android applications, the application can be restarted from the background list. The point of this option is to disable the SSH server if that is desired. Do be careful when using this option — it will close any ongoing shell sessions and transactions.
Web servers
- SSHeper runs two Web servers for different purposes:
- The log display Web server provides a view of the Secure Shell server's activity log and some related information. Just run a Web browser on a networked machine and enter http://(device name/IP):8080 (default port, user can change) to see the activity log. This is very useful to resolve operational difficulties, especially when trying to read the Android device's activity log on what may be a tiny display.
- The clipboard access Web server gives read/write access to the Android clibboard from any local network browser. Just open a local network browser and enter http://(device name/IP):8081 (default port, user can change) to see a display of the Android device's current clipboard contents.
I find this clipboard access feature very useful. I use it in my library database app to assist Android device book scanning and automated database entry, and I use it to avoid having to type on virtual keyboards — I type a message on a desktop machine with a fullsize keyboard, then copy the text into the clipboard access Web page and transfer it to the Android clipboard.
- To update the browser display with new Android clipboard data, press the "Read (device name/IP) clipboard" button.
- To write new content to the Android clipboard, enter text into the browser display window and press the "Write (device name/IP) clipboard" button.
- The user can change the ports used by the servers, as well as disable individual servers if desired. These options are located on the configuration tab.
User customizations: ~/.profile
When the user logs onto SSHelper either from the local terminal or remotely, the launched shell reads an initialization file located in the SSHelper home directory (full path: /data/data/com.arachnoid.sshelper/home/.profile). The ~/.profile file may be edited to suit user needs and tastes — it can be used hold the user's favorite aliases, among other things.
For example, the default ~/.profile contains this alias:
alias ls="$SSHELPER/bin/ls"This alias allows color directory listings by using the provided Busybox "ls" instead of the default Android executable. But because this alias is located in a user-configurable file, it can be changed, and any number of other aliases and commands may be added.
This example also shows that the environment variable SSHELPER is available, defined to point to the SSHelper base directory (/data/data/com.arachnoid.sshelper), as a convenience to save typing.
The ~/.profile configuration file is meant to get around the fact that the Android platform is ... well, let's say "diverse". There are any number of different Android variations with the same version number, and any number of versions available at the same time, so a program like SSHelper needs to be flexible about its configuration, and users may want to use this file to change some basic assumptions.
User customizations: ~/.ssh/environment
The prior section discusses how to customize SSHelper's login behavior, the behavior that follows a formal shell login from a remote system. For SSHelper accesses that do not involve a login, another configuration file is the right target for customizations, one that is read and acted on regardless of whether the transaction involves a shell login.
To clarify, if a user logs into SSHelper from a remote location like this:
$ ssh (name or IP) -p 2222Then a full shell session is started and the configuration file located at ~/.profile is the right choice for customizations. But if the user issues an explicit command without formally logging on, like this:
$ ssh (name or IP) -p 2222 ls -laThen there is no login shell and ~/.profile is not read or acted on, so another configuration file is the right choice for customizations — ~/.ssh/environment. To explain a bit further, the ~/.ssh/environment file is read and acted on during all SSHelper transactions, but the ~/.profile file is only read during formal shell logins.
One note of caution. The ~/.ssh/environment file contains some essential configuration information without which SSHelper cannot function correctly. Be careful while editing its contents. Some of the entries are optional, but others can prevent SSHelper transactions from completing as expected. To recover from a bad edit of ~/.ssh/environment, one may have to uninstall and reinstall SSHelper.
Public-key (passwordless) logins
- SSHelper provides secure, reliable interaction with your android device through use of the Secure Shell Protocol and its variations. SSHelper can be used without any special setup (all you need to remember is the default password — "admin"), but the supported protocols are both more usable and more secure if certain setup procedures are carried out.
Here is how to simultaneously improve operational security and eliminate password entry:
These instructions are for Linux, but a nearly identical approach work in Windows.
Step 1. If you haven't already done this, generate a pair of SSH authentication keys on your desktop/laptop (don't do this if you've already created a key pair). From a shell session in your home directory:
$ ssh-keygen -t rsa -f ~/.ssh/id_rsa -N ''The above command will produce a key pair in your user-level SSH directory (/home/username/.ssh). The pair are "id_rsa", the private key, and "id_rsa.pub", the public key (technical explanation).Step 2. Make your public key available to your Android device:
SSHelper will ask for a password for the above transaction, but (if all goes according to plan) that will be the last time it will ask for a password.$ ssh-copy-id -i ~/.ssh/id_rsa.pub -p 2222 (android device IP address)- NOTE: Recent Android versions may reject the above "ssh-copy-id" key-copying method. If the above doesn't work, if it generates an error, use this method instead:
$ cat ~/.ssh/id_rsa.pub | ssh -p 2222 (android device IP address) \
'cat >> .ssh/authorized_keys'
NOTE: The above key generation examples using an RSA key are only illustrative. Users may use RSA, ECDSA or ED25519 keys, all are supported by SSHelper (DSA keys are no longer recommended and DSA host keys aren't automatically generated during SSHelper installation, but they can still be manually configured), and the program generates all three types of host keys during installation.
Step 3. Disable password logins in SSHelper:
Now that you've set up public-key authentication, move to your Android device, touch theStep 4 (optional). If you're the only person who uses your Android device, the procedure is complete. But if more than one person needs access to your device, take these additional steps:
- The additional users should create an SSH key pair as above, logged on under their own identity, in their own user directory.
- They may then copy their public key to the Android device as shown above:
This procedure appends the new user's public key onto SSHelper's existing list of authorized keys. This procedure can be repeated as often as necessary, for as many additional users as necessary. (Again, if this method fails, see above for an alternate key copying method.)$ ssh-copy-id -i ~/.ssh/id_rsa.pub -p 2222 (android device IP address)Resolving public-key login issues
Recent versions of SSHelper use the OpenSSH library, which has many advantages over its predecessor but tends to be more strict about the conditions it will accept for a passwordless login. Here are some configuration tips:
Make sure the permissions in both the server and client Secure Shell directories are correct. They should both give a result that resembles this (the '$' symbol at the left is a shell prompt, you don't type it):
$ cd ~/.ssh
$ ls -la
drwx------  2 username users  4096 Nov  2 12:20 .
drwx------ 59 username users  4096 Nov  3 03:53 ..
-rw-------  1 username users 20584 Nov  2 17:26 authorized_keys
-rw-------  1 username users   149 Oct 26 11:54 config
-rw-------  1 username users   668 Oct  6 18:45 id_rsa
-rw-------  1 username users   605 Oct  6 18:45 id_rsa.pub
-rw-------  1 username users 24992 Nov  2 17:30 known_hosts
Your .ssh directory will most likely look different in small ways, but the permissions should be the same as shown above. The meaning of the above permissions is:
- Only its owner should be able to read or write the private key id_rsa. Very important.
- At the discretion of the system's operator, others may have read access to the public key id_rsa.pub and other files, but the currently accepted defaults are shown above.
- The .ssh directory (indicated above by ".") should only be readable, writable and browseable by its owner.
- The user's home directory (indicated above by "..") should only be readable, writable and browseable by its owner.
- The listed files and directories should have the same owner and group as the user, i.e. if the user's login name is "username" and belongs to the group "users", then the files and directories should all have the same ownership and group.
For those unfamiliar with shell commands, here's how to set the above permissions (again, the '$' symbol is a shell prompt, you don't type it):
$ cd ~
$ chmod 700 .
$ cd ~/.ssh
$ chmod 700 .
$ chmod 600 *
Remember that the above permissions must be set on both the server and client home and ".ssh" directories. Remember also that, for the SSHelper server, these permissions are set during installation, so if there is any doubt about their being set correctly, users have the option to fully uninstall, then reinstall, SSHelper.
Some users report that problems with public-key logins were resolved by fully uninstalling, then reintalling, SSHelper. This method has the advantage that it completely erases the SSHelper directories and files, allowing the program to set the correct permissions and default options again.
If all the above steps fail to allow public-key logins, it will be because of something I haven't thought of, but SSHelper has a remedy — a configuration option to reduce the strictness of its tests. In SSHelper, go to the
- For more detailed debugging information in the activity log, users may choose to increase the detail level using the "data logging mode" option selector, and there is an even more detailed debug mode described here.
More optimizations
Here is how to avoid having to type in "-p 2222" as shown above for each SSHelper transaction:
This problem is caused by Android security, which in general is a "good thing™", but is sometimes annoying. In this case, non-root access means applications like SSHelper can't use port numbers below 1024.
Over time the standard user-level SSH port has become 2222, although you can change it if you have a reason to (on a non-rooted Android device, you can't use the default SSH port of 22). But there is a relatively simple way to make your desktop/laptop SSH client aware of this nonstandard port and use it by default for your Android device with no specific port entries. Here's how:
If it doesn't already exist, create a new file in your main computer's user-level SSH directory. Create this file: .ssh/config
Give the file this content:
host (Android device name or ip address)
port 2222
After this step, SSH desktop/laptop clients will no longer need to specify a port as in the above examples.
Here is how to give your Android device a permanent address on your local network:
(Yes, this topic list is getting rather far afield from simply setting up and running SSHelper. But these are important things to know and will make your local network perform more efficiently.)
Did you notice in the above examples how we used (IP address) to identify the Android device? That's fine as long as your local network isn't using DHCP (Dynamic Host Configuration Protocol), which, in exchange for making network configuration easier and more robust, tends to assign IP addresses somewhat randomly. But it's very likely that your local network does use DHCP, which means two things:
Unless you look at the configuration tab in SSHelper each time you turn on your Android device, you won't know which IP address has been assigned to it.
Configuration entries like that in .ssh/config described above are only valid for one IP assignment — if you turn off your Android device, chances are the next time you run it, it will have a different address. This will invalidate the configuration entry.
The solution to these problems is to use DHCP "static leases" in your wireless router. This approach has a number of advantages on a local network — you can make configuration entries like that described above and expect them to remain valid, you can access a device using the same name or IP address perpetually, and you can reliably connect with other machines or devices on your local network, a feature not expected in networks with DHCP address assignment.
Unfortunately, according to this article, what I am calling "static leases" has different names and procedures for virtually every router manufacturer:
- DD-WRT, the makers of the software I have installed on my Linksys routers, calls it "Static DHCP Assignment". Parenthetically I can recommend this software without reservation — it's quite good, and it's free.
- The official dhcpd documentation calls it "fixed-address" assignment.
- Netgear calls it "Address Reservation".
- Linksys (with factory software) calls it "DHCP reservation" or "Static DHCP". Ironically, many Linksys routers won't support the feature with factory software, but will after third-party software is installed.
All these schemes rely on the fact that every networked device has a unique number assigned to it — a MAC (Media Access Control) number, shared by no other device in the world. Here's what a MAC looks like: 64:6a:2c:8e:1e:63. Each of those digits is hexadecimal, and there are 12 of them, so the address space has 1612 members (that's about 2.8 x 10¹⁴).
Given the wide variety of routers and methods for assigning static addresses, I will provide the broad outline of the topic and hope my readers will be able to work out the details for their specific networks. Here are two options and effort levels:
- Option 1: Assign a static lease to the Android device, thus making it consistently accessible on the local network.
- Option 2: Reconfigure the local network to use static leases for every machine that needs to contact any other machine, but retain the other advantages of DHCP (primarily the fact that no configuration is required at the machine level).
Here's how to set up Option 1:
Log onto your Android device
From a desktop/laptop machine, open a shell session and:
In the listing from the above command, notice a line that looks like this:$ ssh -p 2222 (ip address) (after login complete) $ ifconfigwlan0 Link encap:Ethernet HWaddr 64:6a:2c:8e:1e:63The "HWaddr" number is the one you want. In most environments the number can be copied directly from the terminal session, avoiding the possibility of a typo.
- Alternative: Negotiate the Android menu system. Go to Settings, WiFi, choose menu item "Advanced", read MAC address. The drawback to this approach is that you have to write down a 12-hexadecimal-digit number on a piece of paper. So 19th century.
Configure your router to assign this MAC a permanent address:
As explained above, this procedure varies from manufacturer to manufacturer, but for a Linksys router with DD-WRT software installed, simply choose menu item "Services" ... "services", and notice a window labeled "Static leases".
- Click "Add" to create a new entry.
- For "MAC Address", type in the 12-digit hexadecimal address obtained above, formatted the same way: xx:xx:xx:xx:xx:xx.
- For "Host Name", type in your preferred name for your Android device. This is only to help you keep track of your assignments, it's not a name that will be recognized by the local network.
- For "Address", enter a local network IP address (example: 192.168.0.33, but your network address range may differ) that is not used for anything else. This address must be outside the range from which DHCP assigns addresses, and it must not conflict with any fixed address assignments set up for other devices.
Having completed the above, reboot the router, then reboot your Android device to see if the assignment is carried out. If it is, then you have a reliable IP address for your Android device to use in SSH configuration as well as for logging on.
Here's how to set up Option 2:
- Perform the above MAC location steps for each machine on your local network — make a list of MAC addresses for all the machines and devices that need to communicate with each other.
- Configure your router as described above, but make as many entries as you have machines and devices that need to reliably communicate. Make note of the assigned IP addresses for the next step.
- One more step that wasn't in Option 1 — give your machines distinctive names that will be recognized by the local network:
- On each desktop/laptop machine on your local network there is a master file named "hosts", containing machine names and addresses. Although largely neglected in modern times, this file can be used to convert user-assigned names to IP addresses. On Linux machines the file is /etc/hosts. On Windows machines it is C:\Windows\system32\drivers\etc\hosts.
- To write into the hosts file, you need to have root authority. Exercise this authority carefully.
- Here is how the hosts file should look after you have added a few machine names and addresses:
127.0.0.1       localhost.localdomain  localhost
192.168.0.1     machine1.com           machine1
192.168.0.2     machine2.com           machine2
192.168.0.3     machine3.com           machine3
192.168.0.4     myAndroid.com          myAndroid
To actually edit the hosts file, issue one of these commands:
- Linux: $ sudo kwrite /etc/hosts
- Windows: > notepad \windows\system32\drivers\etc\hosts
- Use any names you care to assign to your machines, but don't put spaces in their names.
- Save the file and test it. Its effect should be immediate — you should be able to refer to your network machines by their names.
- Copy the edited hosts file to each machine on your network, so each of them will be able to use machine names instead of addresses.
At the end of all the above procedures, instead of having to type "$ ssh -p 2222 192.168.0.33", then entering a password, you can type "$ ssh myAndroid" and be connected with no password. And when using Linux file browsers to transfer files, the advantages are even more striking — you can just type "sftp://myAndroid".
I have one more note about local networks and routers:
In the DD-WRT software, there is a program called "Dnsmasq", essentially a DHCP server and DNS forwarder that is supposed to confer advantages if enabled. When I first acquired my Android device (A Motorola Xoom), I discovered that Secure Shell sessions would time out and disconnect in two minutes or less, which made long transactions like file transfers impossible.
At first I suspected there was something about the Android software that was causing this problem, but after some intense detective work over several days, I finally discovered that Dnsmasq was terminating its dynamic address leases way too early. I disabled Dnsmasq and the problem vanished.
I mention this because it was a serious problem whose cause was perversely subtle and counterintuitive. And very difficult to track down.
Zeroconf/Bonjour
- SSHelper versions 2.0 and above support Zeroconf, a very efficient way to set things up on a network. Basically, a Zeroconf-enabled device broadcasts its presence, its address and its available services on the local network. Similarly equipped devices can engage the broadcaster's services without having to know about the broadcasting device in advance. In other words, zero configuration is required — Zeroconf.
- Because SSHelper now provides a Zeroconf broadcast, much of the above discussion of finding a device address may no longer be necessary, in particular on a modern Linux laptop/desktop machine and/or a local network that includes a current wireless router. Depending on which Linux distribution you have, you should be able to query your local network and discover the services offered by SSHelper as well as its assigned address.
- With the SSHelper Zeroconf feature enabled, you can refer to your Android device by name rather than needing to remember its IP address — just refer to it as "(device name).local" and name resolution will be taken care of. Most recent Android devices allow you to give them a custom name, and if you do, SSHelper will use that name to identify your device on the local network.
NOTE: On some Android devices there's no obvious way to set the device's name. For this case, SSHelper uses the Bluetooth device name, for which an entry dialog is always available. So if the local zeroconf identifying name for your device isn't to your liking, select Settings ... Bluetooth and open the options menu (usually at the upper right), and select the "Rename this device" option. After an Android device reboot, the local zeroconf-enabled network will begin to recognize the new name.
Rsync Notes
- The rsync application and protocol is a very efficient way to move data between machines, synchronize directory trees, and perform similar activities. At the time of writing SSHelper is the only Android application that fully supports it.
- Because most rsync transfers will take place to or from the directories under /sdcard, and because the "user" associated with /sdcard doesn't have the same permissions as the SSHelper "user", certain things cannot be done. Specifically, the SSHelper "user" can read and write files from/to /sdcard, list directories and so forth, but for some reason cannot change file permissions or timestamps.
- Therefore, to avoid a flood of impertinent error messages as well as to avoid endless re-updating of already-updated files, while synchronizing a directory on /sdcard from a desktop or laptop machine, I recommend that rsync be used this way:
$ rsync -azv --no-perms --no-times --size-only
  (source path)/ (android name or address):(dest path)/
(all on one line)
The above options call for rsync to archive ("-a") the source directory and all subdirectories to the destination, use compression ("-z"), be verbose ("-v") about what it's doing, don't try to modify destination times or permissions ("--no-perms --no-times") and , when comparing source and destination files, only compare sizes ("--size-only"), since the destination files' times and permissions will be wrong.
The reason for these options is if rsync is allowed to compare times and permissions, because it wasn't able to correctly set the updated files' times and permissions as explained above, it will "solve" the problem by copying all the files over again, every time the operation is carried out. It's expected that a size comparison will detect and update changed files in most cases.
There's one more option the user may want to include: delete ("--delete"). This option deletes any files on the destination directory tree that aren't on the source. Including this option assures that the destination directory tree will be identical to the source, even after deleting files from the source. But it's a risky option if the user isn't perfectly clear about which is the source and which the destination directory and machine.
- If the above command example doesn't work, it may be because the method shown earlier in this article (the first item above under "More optimizations"), to specify a remote port in the SSH configuration, hasn't been performed. In this case, we need to explicitly tell rsync which port to use, like this:
$ rsync -e 'ssh -p 2222' -azv --no-perms --no-times --size-only
  (source path)/ (android name or address):(dest path)/
(Note the green text)
But the configuration-file method shown earlier is preferred, because it prevents the possibility of typographical errors and (maybe) carpal-tunnel syndrome from too much typing.
- To summarize the above, even though rsync can create a file in the /sdcard directory tree, it then can't change its permissions or its time stamp. I personally regard this as a bug, but that doesn't mean it will go away any time soon.
- Notwithstanding the above bug, rsync is a very efficient way to update a music or photo collection, or any other large archive that needs periodic updates in a way that may involve many small changes.
- The absence of rsync support was on a short list of critical, unmet needs that led to my decision to write SSHelper. I regard rsync support as essential to efficient filesystem management.
SSHelper supports SOCKS 4 proxies, and setting up a SOCKS proxy is very easy. The only requirements for using an Android device as a SOCKS proxy host are that the device have access to the Internet (otherwise there's no point) and that it be running an SSH server like SSHelper.
Here is a typical setup procedure (on Linux, of course):
- Install SSHelper on your Android device. Optionally set up public-key login. This isn't a requirement for SOCKS proxy, just a convenience.
- Open a shell session at your desktop machine and enter:
$ ssh -N -D (port) (Android device network name or IP) -p 2222- The SSH port ("-p 2222") specifier can be made part of your SSH configuration as shown above.
- Choose a proxy port ("-D") that's above the protected region, i.e. above 1024. In this example let's use 9999.
- The point of "-N" is to prevent the shell session from being interactive.
- The above command can be put in a shell script, and it can be made to run in the background (by appending an '&' to the command line).
Now let's tell a browser about the proxy:
- Firefox:
- Navigate Firefox's menu system: Edit/Preferences/Advanced/Network/Connection Settings.
- Choose "Manual proxy configuration".
- Select SOCKS version 4.
- Set SOCKS host: localhost or 127.0.0.1
- Set SOCKS port: choose any convenient port. In thie example we're using 9999.
- Google Chrome:
- In this particular respect Chrome is more primitive than Firefox.
- To make Chrome aware of the proxy, you need to launch it with a special command-line argument:
google-chrome --proxy-server="socks4://hostname:hostport"- For the above example, the entry would be:
google-chrome --proxy-server="socks4://localhost:9999"To test the proxy, enter "my ip" as a Google search. The result will be the IP of the remote server, not your local network.
I tested this procedure in a local shell session on an Android device as well (using the SSHelper mini-terminal), meaning a SOCKS proxy can be set up local to the device. Unfortunately at the time of writing the Android versions of Firefox and Google Chrome can't be set up to exploit a locally configured SOCKS proxy.
It's important to understand that a SOCKS proxy hosted by an Android device can't have more abilities than the Android device itself and how it communicates with the Internet. One example of a limitation is firewall issues, in which a firewall between the Android device and the Internet blocks some or all of the ports and capabilities that SOCKS requires. Another issue is permissions — many remote hosts block proxies if they can or require special permissions. A SOCKS proxy set up on an Android device can't magically circumvent these kinds of restrictions.
If you're just interested in uploading media to your Android device in the most trouble-free way, or want to set up network communications so they're as transparent as possible, you don't really need this section. This section deals with a special mode that, after some rather risky procedures, confers administrator or "superuser" rights to an Android device's owner. If the procedures are done badly, they confer superuser rights to anyone who happens to log in, or even worse, can cause your Android device to become utterly dead, a doorstop, useful only on windy days. You've been warned.
First, some terminology:
- An Android device that can confer superuser rights is said to have been "rooted."
- A device on which the procedure has failed, and that has become dead, is said to have been "bricked."
- If you embark on this activity, be careful that you don't get in a hurry, bypass "rooted" and go straight to "bricked."
I've added this section by popular demand. It seems many SSHelper users want to be able to go into superuser mode from my program. As it happens, for SSHelper versions 3.8 and above, that's not difficult at all, but again, the superuser mode isn't at all like normal Android activities — you can trash your device in unrecoverable ways.
Also, to explain this topic, I have to make some assumptions, one of which is the rooting-aware Android distribution the user chooses to install. I chose CyanogenMod for my spare Android device (a rather dated Motorola Xoom), which I decided to root just to be able to test the mode with SSHelper, not because I have any particular interest in rooting Android devices.
I'm not going to explain how to root an Android device — others have explained it better, also I realize that if I leave out some crucial detail, I might be responsible for turning a bunch of high-tech tablets into cracker trays. I only mention CyanogenMod because installing it was relatively easy, and because some details in what follows are specific to it and to an Android app called SuperSU. And be careful — it turns out there's more than one Android Superuser application. I recommend the one I've linked above, the one written by Koushik Dutta, primarily because it's open-source, but it also seems well-written.
Here are the steps to enabling superuser mode from SSHelper in an Android device with CyanogenMod installed:
- Again, these instructions assume the device has already been rooted.
- Uninstall any prior version of SSHelper from your device.
- Install the latest SSHelper version from the Google play store, version 3.8 or newer.
- If your CyanogenMod version doesn't have SuperSU built in (some new versions do), you will need to install it also.
- The SuperSU application has a security configuration section in which you set superuser logon permissions.
- Just to get started, to avoid difficulties while becoming familiar with superuser logons, set relaxed permissions in the SuperSU application — more or less like this (superuser) or like this (SuperSU). You can increase the level of security later, after successfuly testing superuser mode.
- Run SSHelper on your device and make it accessible to your network.
Start an SSHelper shell session either from its own terminal or (preferred) from another machine, and type this (user's entries are in green):
$ ssh (android device name or IP) -p 2222
SSHelper Copyright (c) 2014, P. Lutus http://arachnoid.com/android/SSHelper
[username@localhost /data/data/com.arachnoid.sshelper/home]$ |
The above shows a successful SSHelper logon.
If you have followed all the instructions so far, and if you have configured the Superuser application as shown above, you're ready to type this:
[username@localhost /data/data/com.arachnoid.sshelper/home]$ su
username@android:/data/data/com.arachnoid.sshelper/home # |
The '#' prompt character is the traditional way to indicate superuser or root access.
Here are some ways to test whether you actually have root access:
username@android:/data/data/com.arachnoid.sshelper/home # ping 8.8.8.8
PING 8.8.8.8 (8.8.8.8): 56 data bytes
64 bytes from 8.8.8.8: seq=0 ttl=45 time=55.733 ms
64 bytes from 8.8.8.8: seq=1 ttl=45 time=62.904 ms
( ... )

username@android:/data/data/com.arachnoid.sshelper/home # traceroute 8.8.8.8
traceroute to 8.8.8.8 (8.8.8.8), 30 hops max, 38 byte packets
1  192.168.0.95 (192.168.0.95)  2.708 ms  1.242 ms  1.947 ms
2  10.65.4.1 (10.65.4.1)  23.436 ms  11.141 ms  10.679 ms
3  24.143.127.129 (24.143.127.129)  12.361 ms  11.908 ms  13.150 ms
4  24.113.16.1 (24.113.16.1)  16.002 ms  28.197 ms  22.709 ms
5  64.146.252.249 (64.146.252.249)  12.176 ms  21.119 ms  24.877 ms
6  64.184.133.70 (64.184.133.70)  19.423 ms  13.179 ms  11.724 ms
7  66.249.94.214 (66.249.94.214)  11.801 ms  66.249.94.212 (66.249.94.212)
24.914 ms  66.249.94.214 (66.249.94.214)  14.273 ms
8  66.249.94.197 (66.249.94.197)  26.675 ms  66.249.94.199 (66.249.94.199)
16.210 ms  15.423 ms
9  216.239.46.158 (216.239.46.158)  63.807 ms  216.239.46.156 (216.239.46.156)
43.581 ms  216.239.46.158 (216.239.46.158)  43.965 ms
10  216.239.46.53 (216.239.46.53)  60.283 ms  51.846 ms  55.939 ms
11  216.239.46.191 (216.239.46.191)  52.155 ms  54.138 ms  216.239.43.217
(216.239.43.217)  52.903 ms
12  *  *  *
13  8.8.8.8 (8.8.8.8)  62.200 ms  52.805 ms  62.179 ms

username@android:/data/data/com.arachnoid.sshelper/home # iptables -L
(long list of firewall rules ...)
The above are three very useful commands that you can't run as an ordinary user.
- Remember, if you don't get the above results, ask yourself whether you fully uninstalled, then reinstalled, SSHelper version 3.8 or newer, and whether you actually rooted your device with CyanogenMod or another similar rooting package, and whether you have installed Superuser or a similar package. (CyanogenMod is the garden, Superuser is the gatekeeper.)
Installation Issues
Uninstall then reinstall: Because SSHelper uses native-code binaries, installing a new version sometimes requires that the old version be completely uninstalled, to assure removal of the old files. If you see an error message about the server not running or not being able to find a required library, try this method:
- Select the Android menu item "Apps".
- Select SSHelper.
- Select the "Storage" option.
- Clear Cache and Clear Data.
- Use the back-arrow to return to the main SSHelper screen.
- Force Stop and Uninstall.
- Now turn off your Android device, don't just reboot.
- Restart your device and reinstall SSHelper.
Users tell me this remedy restores SSHelper to full operation. Also, this procedure should not be necessary in the most recent SSHelper versions, because I now erase all prior files as part each version update.
Multiple Android users: A SSHelper user recently reported that he couldn't get SSHelper to work properly, and after a rather long exchange, it was revealed that he was logged on as a secondary user when he installed SSHelper. Multiple users is a relatively new Android feature, but when installing applications, it can cause problems. Make sure you are logged onto your Android device as the primary user before installing SSHelper.
If you find yourself in this situation, uninstall SSHelper, log on as primary user, and reinstall.
Prevent Android's "Close all" function from closing the SSHelper server
I have been getting some user feedback that the "Close All" function closes the SSHelper server in some (but not all) Android versions, in cases where the user wants the server to persist. This is something that Android does and that my program cannot independently override.
It turns out there is an easy Android setting to prevent this:
- Enter the "Close All" display.
- Press the three vertical dots at the upper right.
- Choose the "Lock apps" menu option.
- The first time this function is activated, an explanatory screen will be displayed — read and dismiss it.
- In the upper-right corner of the displayed SSHelper application, a padlock appears that will display as locked or unlocked. Click it to make your choice — if it displays as locked, SSHelper's server will not be closed by "Close all."
- Select "Done" at the top of the display.
Keep Android from automatically shutting down the server
On newer Android versions, after a short time the system will shut down the SSHelper server to save battery power. This might be desirable if the server isn't in use, but if you need the server to be always available, take these steps:
- Select Android menu item "Device Maintenence."
- Choose the battery option.
- Select the "Unmonitored Apps" option at the bottom of the list.
- Select "Add Apps."
- Select SSHelper.
This procedure will assure that the SSHelper server will continue to run. If your use of SSHelper decreases, remember that you made this setting, because it will run down the device's battery during mobile use.
High CPU usage
From time to time I get a user report of high CPU usage by SSHelper. In tests I have never been able to create a case where the CPU usage couldn't be explained by what SSHelper was doing — serving network requests during file transfers, displaying its user interface, serving log and clipboard interface Web pages, things like that.
Here are some suggestions to reduce SSHelper resource use:
- Obvious: If you're not using the SSHelper user interface, dismiss it — remember that SSHelper runs an Android service, so ongoing network activities won't be disrupted by closing the user interface. Dismissing the user interface greatly reduces the SSHelper processor load and memory usage.
- Drastic: if you see high SSHelper CPU usage you can't explain and you just want to remedy it when you're not actually using SSHelper, simply shut the program down — use menu item "Stop Server & Quit". This menu option completely shuts SSHelper and its Android service down. But remember you did this the next time you need SSHelper's network servers, because at that point you will have to restart it.
- Fine tuning: if you see high SSHelper CPU usage but need its network services, beyond the above suggestions try turning off its Web servers, for log and clipboard display. On the configuration tab unselect "Enable log display server" and "Enable clipboard display server". An alternative is to make sure you don't have a desktop browser displaying these web pages — that display will use up system resources because those pages auto-refresh when serving a browser.
- Shell-related: Try exiting interactive shell sessions when they're not in use. And remember that tasks launched by way of shell sessions may be included in SSHelper's CPU usage total.
Android 5.0 Update
On the release of Android 5.0, many of the shell commands provided by SSHelper stopped working because of a change in Android executable requirements. As a result, in SSHelper Version 6.9 and newer, a new SSHelper scheme is provided in which two binaries are provided, one that provides position-independent executables (required for Android versions ≥ 5.0) and one that doesn't (required for Android versions < 4.1). The installer decides which binary to use at install time.
If you can't get common shell commands to work, try uninstalling and reinstalling SSHelper, to force a full reinstall including the above-described installer configuration.
Hash mismatch
After a major rewrite of this application (after replacing Dropbear with OpenSSH), I began to receive reports of an occasional error that prevents passwordless logins and sometimes produces an activity log error message including the phrase "hash mismatch". The details are a bit complex, but the remedy may be to fully uninstall, then reinstall, SSHelper with a newer version. Don't simply upgrade. If it works, it's a pretty simple remedy, and I apologize for this bug.
If the above remedy fails, if after a reinstall the "hash mismatch" error message continues to appear, based on some online research I now realize the problem may sometimes be a bug in the Secure Shell libraries — one that only affects RSA keys. So one remedy would be to use ECDSA keys instead of RSA. This may see a rather extreme solution just to use my program, but because this is a longstanding bug that occasionally crops up in all environments reliant on OpenSSH, and because these newer key types are also better in a number of ways, the decision to change key types might be a wise choice regardless of the outome for this specific program.
Interactive Shell Failure (fixed)
Until SShelper version 7.1, an Android security scheme called "SEAndroid" had prevented interactive shell sessions. The reason is a bit technical, but it involved a call (within the OpenSSH function openpty()) to the function grantpt() with an opened handle to /dev/ptmx, and on Android devices this call always failed for a security-related reason, but without a security-related justification. The solution, implemented in SSHelper 7.1, is simply not to make this call. I guess this may be an example of the old saying, "It's better to ask forgiveness than permission."
For this bug fix I am indebted to a loyal and technically skilled SSHelper user for his helpful suggestions on this issue. I'm not sure the user would want to be identified by name here, but suffice it to say that I had not gotten anywhere near a solution to this bug before he submitted his bug report and suggestions.
General problems
- Most SSHelper issues have to do with understanding how Secure Shell transactions work and how to set them up. Public-key logon issues are covered here, and more technical depth can be found here.
To get more detail about logon issues, the user can invoke the SSH client like this:
$ ssh -vvv (Android device name or IP) -p 2222The above command-line option "-vvv" will produce a flood of detail about the logon transaction from the perspective of the client program. I have found this method useful in uncovering issues like file and directory permissions that Secure Shell requires.
One reliable remedy for a number of issues is to fully uninstall, then reinstall, SSHelper, especially if some time has passed since the last upgrade.
Over the years Google has made it more difficult to write directly to Android external storage devices (where they exist), to the extent of not including such a device in units of their own design. There are security arguments in favor of encrypting all Android storage to thwart hackers, but the result is that users have a much harder time simply writing files to the external storage device.
In this section I describe a number of ways to enable write access to an external storage device, ranging from difficult to very difficult. On reviewing the available methods and the obstacles to simple data storage, one might conclude that the hackers have won. That argument has some merit.
To begin, and to respond to any number of inquiries about this, I should clarify that there's an interactive method built into recent Android versions to allow access to external storage, but it only works with Java applications, not native-code binaries such as SSHelper uses. Obviously a remotely logged-in user cannot click a local Android system dialog to gain access to a specific storage location. This is why the following methods represent the only practical approach.
The New Ways (Android 6.0 and newer):Method 1: Application Data DirectoryThe Old Way (pre-Android-6.0):Method 2: Storage Device AdoptionIn this method, we create a directory on the external storage device that's owned by SSHelper, and having created it, we can write to it. There are some drawbacks to this method:
- To set up this method, the user must temporarily remove the external storage device, connect it to a laptop or desktop machine and create a special directory accessible by SSHelper.
- If you should decide to uninstall SSHelper, Android will delete the special directory and all your data with it. Like all unexpected data losses this generally comes as a shock, so be prepared for it by backing up your files, and never allow a unique copy of any file to be placed in this volatile directory.
Having given the above warnings, we can move forward:
- For the next step, either:
- Use an Android file explorer if available, or
- Temporarily shut down the Android device, remove the external storage element and connect it to a laptop or desktop computer.
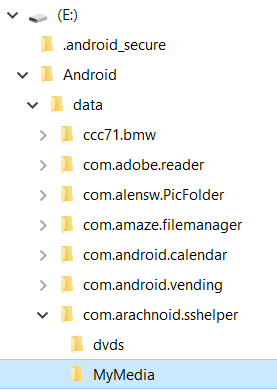
- Create a new directory on the storage element with this full path: /Android/data/com.arachnoid.sshelper (see adjacent image).
- If the storage element has been connected to your Android device, it will probably already have a directory named /Android/data, in which case you only need to add the subdirectory com.arachnoid.sshelper within the data directory.
- If you have a media collection you want to copy into the storage element's new directory, this would be a good time to perform the transfer — read/write times are faster when directly connected to a laptop or desktop than across the network.
- Move the storage element back to the Android device.
- If the above succeeds, and if SSHelper has been installed on the device, the new directory will be located and accessible at (path to external device)/Android/data/com.arachnoid.sshelper. This directory will be readable and writable by SSHelper, using file operations managed by SSHelper including remote ones.
- Using SSHelper for the file transfers, if you haven't already done so, populate this new directory with your media and other data. Any Android application can read the files in this special directory, but file writes must be performed by SSHelper.
- The above directory creation ritual need only be performed once. After the special directory has been created it is writable by SShelper with no special actions required, and it's readable by any other Android program.
- Again, this warning — if you decide to uninstall SSHelper, Android will automatically delete this special directory and its contents. To keep this from happening, remove the storage element, connect it to a laptop or desktop and rename the special directory to protect it from deletion by Android.
For some years now SSHelper has not been able to access an external storage element without difficulty, and root access was often required to make it possible. With Android 6.0 and newer, a better method has been added to Android that merges external storage with internal storage. This section explains how to set this feature up and make all your device's storage available to SSHelper, and to you.
Non-Samsung Devices
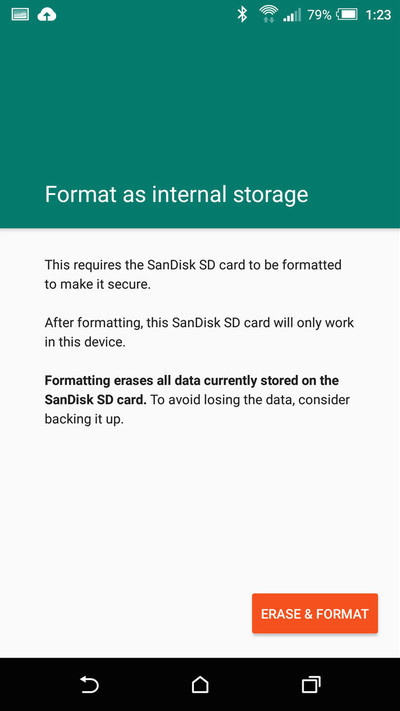
On many post-6.0 Android devices (except Samsung, see below), when you insert an external storage element into the Android device, you will be prompted with an offer to "Format as internal storage". Before you leap, consider these advantages and drawbacks:
- Pros:
- The external device's storage is seamlessly merged with internal storage, so it becomes available to SSHelper and to remote access.
- The external and internal storage have no division between them, so the idea of moving files between them and balancing storage allocation is no longer an issue.
- The new combined storage can be used for both programs and data.
- Cons:
- The external device is encrypted and (unless you divide it into "public" and "private" partitions), it cannot be used outside the device and probably should not be removed.
- If you remove the external device after adopting it, this could have pretty bad consequences — it's better to leave it installed and read/write to it using programs like mine.
- If the exernal device is not the fastest available SSD, this could slow your Android device down, because Adroid won't distinguish between the two sources of storage space. So if you decide to use this method, choose the fastest storage device you can get.
Samsung Devices
Samsung is an incredibly paternalistic company. I wonder if they even realize their customers are grownups? Oh, excuse me, I almost went off on a childish rant that might have confirmed Samsung's low opinion of their customers.
Samsung doesn't provide a dialog for the feature described above — apparently they don't think their customers are technically proficient enough to click a button on a dialog — but it's still available in their devices. Here's how to enable it:
- First and most important, if you have data on the external device that you need to keep, back it up now. This procedure will completely erase the external storage device.
- Oh — did I mention that you need to back up your external storage device data before going on with this procedure?
- You don't need to root your device for this procedure. And, because it's a Samsung device, rooting it would void your warranty, so maybe that's not such a good idea anyway.
- Enable the Android "Developer mode" by going to the system menu, accessing the "About device" menu item, locate and and press the "Build Number" item seven times, during which the system will start telling you that you're about to "become a developer".
- After enabling "Developer mode", a new menu item will appear called "Developer options." Select it and enable the "USB Debugging" option.
- On your laptop or desktop machine, download the "Android Debug Bridge" software — Windows download — Linux download.
- Unpack the ZIP archive and put the contents in any convenient location.
- If you're only interestied in performing this procedure and are in a hurry, simply navigate to the directory where you unpacked the ZIP archive and navigate to (base directory)/platform-tools/
- Use a USB cable to connect your Android device to your laptop/desktop machine.
- Open a terminal session in the directory containing the ADB executable (named "adb.exe" on Windows and "adb" on Linux).
- In the ADB shell session, enter:
Watch your android device, because it will show a dialog asking for permission for the ADB session to begin. Confirm the choice.adb devices (Linux: ./adb devices)- Once you are sure you have a connection, enter:
This should begin an interactive shell session on the Android device.adb shell (Linux: ./adb shell)- Enter:
This should produce a result printout more or less like this (your numbers will probably be different):sm list-disksdisk:179,64- Now decide if you want the external storage device to be all private storage (recommended) (meaning joined with the Android internal storage), all public (meaning conventional external storage, inaccessible to many Android apps) or a mixture of both.
- If you want all the external storage to be private (i.e. to be merged with Android internal storage) (recommended), enter:
Replace "nnn,nn" with the numbers you received with the command above.sm partition disk:nnn,nn private- If you want all the external storage to be public (i.e. conventional external storage), enter:
Replace "nnn,nn" with the numbers you received with the command above.sm partition disk:nnn,nn public- If you want a mixture of public and private storage (a tricky business in which you have to turn off the Android device, remove the card, read/write to it, and restore it before turning the device on again), enter:
Replace "nnn,nn" with the numbers you received with the command above, and replace "25" with the percentage of externally accessible space you want reserved.sm partition disk:nnn,nn mixed 25- This ends the procedure. Check the amount of available storage space on your device — it should be larger by the size of the private allocation you just made.
Now SSHelper can access your files once again, after years of annoying and pointless obstacles.
NOTE: This method is tricky and not recommended — see above for the methods used on newer Android versions (6.0 and newer).
These older Android devices have a perverse feature that prevents write access to the device's external storage, if present. I've examined the options for getting around this, unfortunately for someone logging in from a remote location expecting to update their device automatically, using basic tools like rsync, there are no easy solutions.
One solution, not at all easy, is to take the external storage device out of the Android device, write to it elsewhere, and put it back. This is a great pain, and works only if you have access to the device and are a bit of a techie.
There's a more difficult solution that grants permanent write access in place, which I will explain here. But be warned — this is not a normal activity for end users, and without being careful you could brick your device. You've been warned. Here are the instructions:
- A required preliminary is to root your Android device. I won't try to explain how this is done, there is plenty of instruction on this topic elsewhere on the Web.
- Set up SSHelper in the usual way, so that you can reliably log onto your Android device in a Secure Shell session, as explained earlier in this article.
- In this first phase, we only need to copy a file from the device to your desktop or laptop for editing. No great risk of things going wrong ... yet.
- Copy the desired configuration file from the Android device to a working directory on your main computer. From a desktop or laptop shell sesion:
$ scp (device name or IP):/system/etc/permissions/platform.xml .- Using your favorite editor, edit a particular section of this file. Here's the section of interest before being changed:
<permission name="android.permission.READ_EXTERNAL_STORAGE" > <group gid="sdcard_r" /> </permission> <permission name="android.permission.WRITE_EXTERNAL_STORAGE" > <group gid="sdcard_r" /> <group gid="sdcard_rw" /> </permission> <permission name="android.permission.ACCESS_ALL_EXTERNAL_STORAGE" > <group gid="sdcard_r" /> <group gid="sdcard_rw" /> <group gid="sdcard_all" /> </permission>- And here is how it should look after editing — the additions are green:
<permission name="android.permission.READ_EXTERNAL_STORAGE" > <group gid="sdcard_r" /> <span style="color:green"><group gid="media_rw" /></span> </permission> <permission name="android.permission.WRITE_EXTERNAL_STORAGE" > <group gid="sdcard_r" /> <group gid="sdcard_rw" /> <span style="color:green"><group gid="media_rw"/></span> </permission> <permission name="android.permission.ACCESS_ALL_EXTERNAL_STORAGE" > <group gid="sdcard_r" /> <group gid="sdcard_rw" /> <group gid="sdcard_all" /> <span style="color:green"><group gid="media_rw" /></span> </permission>- Save your edits.
- In the desktop/laptop shell session, copy the edited file to the SSHelper /home directory:
$ scp platform.xml (device name or IP):~ $ sync- Now we must log onto the Android device and perform some actions as root. Be careful doing this.
- Log onto your android device in a shell session:
$ ssh (device name) SSHelper Version 7.7 Copyright 2014, P. Lutus u0_a219@MSM8974:/data/data/com.arachnoid.sshelper/home $- Become superuser. I did mention that you need to have previously rooted your device, yes?
u0_a219@MSM8974:/data/data/com.arachnoid.sshelper/home $ su root@MSM8974:/data/data/com.arachnoid.sshelper/home #- Make the edited file's storage location writable, then move the edited configuration file to its intended directory:
# /system/bin/mount -o remount,rw /system # mv platform.xml /system/etc/permissions/- Reboot your Android device. (I could have gone through the procedure for manually remounting the /system directory read-only, but rebooting the device involves fewer risks, and a reboot is required anyway.)
- Test for write access to locations on the external storage device.
Philosophical rant: About this new, restrictive change in Android — years ago, I said something about a similar, smaller change. I said, "With each passing year, because of advances in computer technology, there are more things, each more sophisticated, that we aren't allowed to do any more." At that time, the world of computing was much smaller and there was much less at stake. But it was already obvious that a priest class was forming, composed of people who knew what whas good for you and who couldn't be bothered to listen to users any more.
When I first encountered this new "feature," I tried to solve it by adding the required permission in my Android development environment — in the SSHelper source code I tried to add:
When I added this to my program, the new line was quickly highlighted in red and an error message appeared:
Permission is only granted to system apps."System apps," I like that way of putting it. I've been in this business a long time, almost forty years, and I know when I'm being called a mere mortal, unwashed, not worthy to touch the hem of a priest's garment. Pardon my rant.
Assuming a non-rooted Android device, there's no standard way to provide local (meaning local to the Android device) name resolution — one can't simply create and save an /etc/hosts file on a non-rooted Android device as one can do for a desktop or laptop machine. But in the context of the various Secure Shell commands (ssh, scp, sftp, rsync), there's a way to provide name resolution on the Android device. One can create a Secure Shell setup file located in the SSHelper home directory tree at ~/.ssh/config that SSHelper doesn't create by default, and include in it some name/IP mappings. An entry looks like this:
An example with actual values:
There can be as many such entries as are required, one per name/IP pair. This scheme only works if your local network has fixed IP addressing — for a default DHCP-based network with random IP assignments, it's not practical — it only works if your network uses either static addressing or DHCP address reservation, i.e. fixed IP adresses, automatically assigned.
I recently created a scheme to automatically populate my wireless routers with predefined name/IP mappings to avoid the problems caused by the ordinary random-IP-assignment DHCP system. This change greatly sped up my network and made it more reliable, but because it uses fixed IP addresses it also makes this Android name resolution idea practical.
It's important to say that this name resolution method only works with commands that are part of the Secure Shell family — ssh, scp, sftp, rsync. Sadly, this example won't work for local network names:
But this example will work:
Verbose Log Modes
With respect to the above issues and for general problem solving, some special debugging modes have been added to recent SSHelper versions. The advantage of the special modes is that much more debugging information is entered into the activity log. The drawback to the more detailed modes (1-3) is that only one login is allowed at a time, so these are temporary modes for problem analysis only. To enable and use the special modes:
- Verify that the data logging mode selector (located on the configuration tab) is set to one of the "SSH Server Debug" selections, each followed by a number between 0 and 3 inclusive. Higher numbers provide more detail.
- An alternative mode for general Android operational issues is to select one of the "LogCat" modes, between "Fatal" (not very useful) to "Verbose" (very detailed).
- Restart the SSHelper server by pressing the
- From a desktop shell session, log onto the Android device — type "ssh (Android device name or IP) -p 2222".
- From a browser on your main machine, go to http://(Android device name or IP):8080. You will see many more log entries than usual, some prefixed with "debug(n)", with 1 ≤ n ≤ 3.
- While logged onto your device (or while trying to log on), you will see a very large amount of debugging information entered into the activity log as well as on the browser display. This information can be used to sort out low-level OpenSSH operational issues.
- To copy the log for analysis, you may:
- Long press the SSHelper log display, then choose "Copy as Text" or "Copy as HTML". Then open a suitable Android application into which one may paste textual content, for example, an email.
- Move to the browser activity log display described earlier (located on your local network at http://(Android device name or IP):8080), press browser "Refresh" to pick up the most recent log entries, use your mouse to click the browser log listing, then press Ctrl+A (select All), Ctrl+C (Copy), then move to a text editor and press Ctrl+V (Paste). The text editor should then have the most recent log entries.
- For practical reasons having to do with avoiding Android slowdowns, the second of the above options includes a much higher volume of log information, so it's the preferred way to get a complete log.
These special debug modes are very useful in analyzing SSH server difficulties that might come up, especially those having to do with key negotiations and encryption. One drawback is that, for the "SSH Server Debug" modes, logons are limited (only one is permitted between server restarts), so it shouldn't be allowed to persist for more than a short time.
Android Device Bridge (ADB) and logcat
For general debugging and exploration of Android, not necessarily limited to SSHelper, users may want to acquire a minimal install of the Android Debug Bridge (ADB), a process described here for Windows machines. For Linux machines the process is simpler — here's a Ubuntu/Debian example (executed as root):
# apt-get install android-tools-adbAfter ADB is installed and an Android device is tethered to your desktop machine by means of a USB cable, you can enable USB debugging on the device and issue some useful commands:
- ADB shell opens a shell in the context of the Android device.
- ADB logcat causes a verbose log to be printed to the console. It's rather difficult to interpret without syntax highlighting or any specified filtering.
- A logcat log can be syntax-highlighted by installing my Python script logcatcolor.py (pretty listing | plain text) and using it like this:
$ adb logcat -v time *:I | (path)/logcatcolor.pyExamples:
- Here's a nearly identical routine written as a Bash shell script (much slower than the Python version): logcatcolor.sh (pretty listing | plain text). It's used exactly the same way:
$ adb logcat -v time *:I | (path)/logcatcolor.shHere are examples of logs with and without syntax highlighting:
The above logcat example shows some additional options:
- -v time is one of a number of display options, one I find indispensable — it includes a time with each log entry.
- The left-hand part of *:I may include a filter expression that can be used to limit the log display to entries having specific content, a topic discussed in depth here.
- The right-hand part of *:I is a letter category, one of Verbose, Debug, Info, Warn, Error and Fatal.
While considering these options, don't forget that SSHelper has a log display server that shows color-coded logcat results, a feature described earlier.
SSHelper versions 12.0 and newer include a number of important changes and enhancements. These result from a major rewrite of the associated binary modules and libraries that come with this program.
Architectural Changes
These changes result from an overhaul meant to meet new requirements for Android versions 9.0 and newer. Recent Android versions require what are called "position-independent executables," or PIEs, in applications like SSHelper that include native-code binaries. That in turn means I could no longer assemble my binary executables in statically linked form, a form that includes its own system libraries. And that means I now rely to a much larger extent on Android's own libraries to function. In many ways that's a good thing, but it also means this app is no longer compatible with Android versions before 5.0 (API 21).
New Versions and Utilities
This update includes the latest versions of Busybox, Rsync, OpenSSH, the OpenSSL encryption library and others. Until now I had been relying on a difficult development scheme that statically linked to Linux generic system libraries, but in the newer versions I'm using the Android Native Development Kit (NDK), which links to Android's own libraries, a big improvement in many ways.
This change also means I'm able to include a number of open-source utilities whose sources were patched by the Termux project to work with the NDK, among which are:
- The latest Busybox multi-executable environment.
- The OpenSSH suite of applications including ssh, scp, sftp and others.
- The very important rsync file system update utility that works with OpenSSH.
- A full-featured Bash shell interpreter to replace the less advanced Android shell.
- Some less important but useful command-line utilities including file, htop, nano, strace, tracepath and tree.
This change to the NDK development system with its reliance on Android libraries means SSHelper now has unfettered access to some Android-dependent utilities including df — utilities that, because they rely on an intimate knowledge of the Android architecture, aren't included in toolkits like Busybox.
Multi-Platform
The new SSHelper package includes two complete sets of binaries and associated libraries, one for 32-bit ARM processor platforms and one for 64-bit. SSHelper installs the appropriate platform executables depending on the detected platform type. This dual-platform scheme is very desirable in Fall 2018 but becomes a requirement by Fall 2019, so just once I'm ahead of the curve.
Reinstall SSHelper Files
Because of the problems caused by incomplete purging of old binaries during program updates, a new command button is included in recent SSHelper versions — "Reinstall SSHelper Files", located at the bottom of the Configuration tab. This command tries to solve an Android system problem — when a new program is installed that includes native-code binaries, the old versions of binaries and associated libraries aren't necessarily replaced, or fully replaced. This command assures their complete removal and replacement.
Spoiled by Apple Writer
This is a philosophical aside. I've been in the software business for a very long time, since the early 1970s. In some ways my first best-seller spoiled me for all that followed. Apple Writer was a meticulously hand-coded (assembly language) word processor for the Apple II that became an international best-seller. It was in many ways the perfect example of successful software development: there was one program version that ran on a worldwide installed base of computers that were all identical. Let me say that again ... all the target machines were identical. If something worked in my little cabin in Oregon, then it worked everywhere else. If a bug report arrived from a small French village, I could reproduce — and fix — the bug in Oregon.
Android Development
At substantial risk of understatement, Android development is different. Android device manufacturers have a free hand in creation of their products. The devices can be any size, geometry, processor type, included or excluded features, display resolution, weight, battery life and network topology. When I first developed SSHelper I didn't fully appreciate the variety of platforms that might run it.
Since my education in the realities of Android development I've tried to avoid too much complexity, aware that the most likely SSHelper user is someone who only wants to update and maintain a collection of music tracks on his Android device, with no particular computer expertise and with a low frustration threshold.
This is why SSHelper automatically uses the same network interface that Android chooses, without requiring user intervention if there's more than one interface. When I first saw this problem it occurred to me that if I required users to choose between network interfaces before uploading their music, I would lose half my users, in the same way and for the same reason that a popular science article is said to lose half its readers for each included equation.
Some parts of the Secure Shell protocol need user input for configuration, so the configuration tab is a bit intimidating at first sight, but most of the settings can be left with their defaults.
External Storage Access
An unsolved but serious problem in the Android ecosystem is access to external storage, which at the time of writing is somewhere between difficult and impossible (this topic is fully addressed in the main documentation section above). To me this is the single most glaring deficiency in the present Android environment. I think the Android system should allow users to elect to have unfettered access to the external storage device, which would mean no application-specific directories or system-privileged content, just a single data store entirely available to the device's user. Why this solution hasn't occurred to Android's overseers is beyond me.
Terminal and other issues
In the new versions the SSHelper terminal tab remains a crude terminal emulator with access to the SSHelper system level, but it's still not very good and in most cases users are better off using a remote connection from a desktop/laptop and a Secure Shell session. The present terminal uses the new Bash shell instead of a local Secure Shell session, with a number advantages, but it's stil a rather crude imitation of a real terminal session.
SSHelper behavior on rooted devices can be expected to work as always, but since I no longer root my Android devices I'm completely reliant on user feedback for any issues that come up on these devices. On that topic ...
User Feedback
Because of the new architecture I can add more Unix/Linux command-line utilities within reason, so if users want a particular utility to be included, I ask that they suggest it and I will see if it's feasible to add.
If users have any problems installing or using the new versions of SSHelper, please report them and I will see if I can make revisions and/or corrections.
Compatible Android Versions
At the time of writing, because of the new architecture and packaging, SSHelper is compatible with Android versions 5.0 (API 21) through the current version at the time of writing (Android 9.0, API 28). There's no particular reason to expect SSHelper to suddenly stop working with new Android version releases, but since that has happened many times, this is another class of report I would appreciate getting from users. Thanks!
SSHelper is free, it doesn't show ads, it's not crippleware or shareware, and I don't want your money. I just thought I would make that clear up front.
Years ago, in connection with my software development activities, I came up with an idea I called CareWare. But as the years went by I became somewhat disenchanted with the original idea and I now find it somewhat overheated (even though it's my idea).
So lately, moved as I am by conflicting forces — on one hand wanting to change the world, but on the other not wanting to even appear disrespectful of other people's choices — I've decided to just say pay it forward if you want. But there's no obligation to do that.
SSHelper : FAQ/User Feedback Page
This section links to an archive of old SSHelper versions. I created it after realizing that certain questionable Web outfits were offering apparent SSHelper downloads that were nothing of the kind.
To download an old SSHelper version, click the link below, select a version (the file names are modified SSHelper version numbers: 127.apk = version 12.7), click the file and in most cases it will be downloaded. If this method fails, right-click and select "download."
To install one of these files on your Android device, download and copy to your Android device, locate it using a file explorer and select it. In most cases you will be prompted to install it, possibly with a side trip to enable APK installs from unknown soures.
Click here to visit the archive.
SSHelper is Copyright 2018, P. lutus and is released under the GPL.
SSHelper uses code from the following projects:
Here is a source archive for SSHelper, organized as an Android Studio project.
Version History (reverse chronological order)
08.26.2020 Version 13.2. Revert to Android 9 (API 28). To my shock and dismay, some changes have been made in Android 10 that will destroy the fundamental principles on which this application is built: (a) no more access to a directory of executable binary files such as one sees in Linux and other modern operating systems, and (b) no more access to the user data area /sdcard. Without this access, nothing works — the SSH server cannot function, and SSHelper users cannot access the primary data storage area as is true in all modern, civilized operating systems. Therefore, this is likely the last version of SSHelper. Users who want continued access to this application need to visit this page, the SSHelper Home Page, to pick up this version or any prior releases they may need for older Android devices. Because of this reversion to API 28, SSHelper will probably vanish from the Google Play Store within 60 days at the most. And in a future Android version past 10, even this SSHelper version will likely stop functioning.
For more detail, read the "Major Development" section at the top of this page.
- 08.25.2020 Version 13.1. Mandatory retargeting to Android 10 (API 29) (failed).
- 10.01.2019 Version 13.0. Recoded the terminal module for better behavior, but users should consider alternatives for this function, and see the SSHelper FAQ for usage specifics.
- 09.01.2019 Version 12.9. After field testing and user reports that show compatibility only with Android versions ≥ 7, changed minimum compatible Android version to 7. Users of earlier Android versions are encouraged to download and install from my release archive located at https://arachnoid.com/android/SSHelper .
- 07.24.2019 Version 12.8. Added android.permission.FOREGROUND_SERVICE, apparently required by Android versions 9+.
- 07.16.2019 Version 12.7. Revised SSHelper for compatibility with the most recent Android version (9).
- 10.29.2018 Version 12.5. Changed shutdown procedure to avoid a unfixed inconsistency in Android that would prevent a reliable shutdown.
- 09.08.2018 Version 12.4. Recreated all binaries and libraries for greater efficiency, fixed a few small bugs.
- 09.04.2018 Version 12.3. Solved a persistent application/dialog icon issue, made some layout changes to accommodate Android updates and small displays.
- 09.03.2018 Version 12.2. (1) Added more utility programs (htop, tracepath, tree). (2) After user correspondence and research, reluctantly changed the minimum acceptable Android version to 5.0 after realizing the new required compilation method (dynamic libraries) prevents SSHelper from working on Android versions < 5.0. This change only acknowledges reality, it doesn't exclude older devices — the new code requirements do that.
- 09.03.2018 Version 12.1. Corrected a path assignment critical to allowing Android-native utilities (example: df) to work within SSHelper as they should.
- 09.02.2018 Version 12.0. SSHelper is now a dual-platform application — it automatically installs the appropriate native-code binaries on 32 and 64-bit ARM processors. Included are more command-line utilities such as bash, nano, file and strace. Secure Shell logon sessions and the terminal utility now use the included bash shell for better performance. A new manual-reinstall command replaces all the binary executables and libraries to assure that everything is up to date and correctly configured. A number of past annoying behaviors have been analyzed and corrected.
- 08.30.2018 Version 11.9. Revised code to deal with installation issues, added Bash shell interpreter, updated built-in terminal code.
- 08.29.2018 Version 11.8. Changed installation code to fully remove prior install libraries/binaries, added "nano" command-line text editor, fixed some small bugs.
- 08.27.2018 Version 11.7. Fixed a small bug related to recent major changes. NOTE: For some devices a complete uninstall and reinstall is needed to restore correct operation.
- 08.27.2018 Version 11.5. This is a major code update to accommodate Android 9's new requirements. NOTE: For some devices a complete uninstall and reinstall is needed to restore correct operation.
- 08.14.2018 Version 11.4. Corrected an error in the type of the application's displayed icon.
- 08.12.2018 Version 11.3. Fixed a bug that sometimes prevented clean reinstalls of prior SSHelper versions.
- 08.11.2018 Version 11.2. Restored operation of the rsync file transfer utility. To get this change in behavior, some users may need to fully uninstall and reinstall SSHelper.
- 08.08.2018 Version 11.1. Fixed a problem with the run-at-boot feature on certain Android versions.
- 08.07.2018 Version 11.0. Created special notification handling scheme required by Android versions 8.0+.
- 08.07.2018 Version 10.9. Refactored the server entry/exit code for more consistency between Android versions.
- 08.06.2018 Version 10.8. Cleaned up some code areas that produced different behaviors on different Android versions.
- 08.06.2018 Version 10.7. Fixed a configuration error (no WAKE LOCK permission) that caused a failure on some older Android versions.
- 08.04.2018 Version 10.6. Revised startup code to allow SSHelper to autostart and run in the background on Android 8.0+ versions.
- 07.25.2018 Version 10.5. Changed the search order in the default system PATH variable to resolve issues in newer Android versions that have overlapping commands originally only handled by SSHelper. This change makes SSHelper work better in all Android versions, but it doesn't solve the serious rsync problems caused by Android 8.0+, for which there may be no solution (sftp and other modes still work).
- 10.26.2017 Version 10.3. Fixed an annoying password-change issue. In the new version, a password change immediately launches a dialog that explains what must be done, then does it for you.
- 10.18.2017 Version 10.2. Based on field reports, added more remedies for runtime errors in some Android devices.
- 10.15.2017 Version 10.1. Based on field reports, added more safeguards against out-of-bounds and error conditions.
- 10.13.2017 Version 10.0. Changed the OpenSSH source for executable "sshd" to address an issue with Android 8.0. Unfortunately, because I don't have an install of Android 8.0 on any of my Android devices, I can't test this change on the intended target. I must rely on my loyal users to tell me if this change has solved a reported issue.
- 10.10.2017 Version 9.9. Upgraded the OpenSSH configuration to default to the RSA encryption key type, stopped automatically generating the now-abandoned and insecure DSA key type during installation.
- 10.09.2017 Version 9.8. Changed the activity creation process to avoid interrupting ongoing transactions, added a confirmation dialog on server restarts for the same reason.
- 10.09.2017 Version 9.7. Added a few more error guards against null pointers.
- 10.09.2017 Version 9.6. Fixed some miscellaneous bugs and out-of-bounds conditions reported by users.
- 10.03.2017 Version 9.4. Restored the ability to run at boot, a feature temporarily lost during the many recent changes.
- 10.02.2017 Version 9.3. After some user requests and my own experience, decided to abandon the new light theme and return to a dark application theme — much nicer.
- 09.29.2017 Version 9.2. A major interface overhaul and some new features. This version uses the new "Fragments" layout and color scheme. There's a new option for the user to change SShelper's Android write permissions from within the app, as well as a configuration option to disable file writing if the user prefers. A number of code changes increase reliability during an activity's lifecycle. There remains a problem with some Android devices running Oreo (i.e. 8.0), one I won't be able to fix until one of my four Android devices gets the update.
- 08.05.2017 Version 9.1. Created an rsync binary based on the most recent source (i.e. rsync 3.1.2) that should work on all Android versions that SSHelper supports. This should resolve the "Kernel too old" error messages reported by some users.
- 07.23.2017 Version 9.0. Reluctantly gave up on the idea of creating an rsync binary that will work on all Android versions and kernels. Returned to rsync version 3.1.2, the most recent version at the time of writing. This rsync binary will not work on all Android devices, but it will work on the majority of them. This update also addresses some important security issues.
- 07.22.2017 Version 8.9. Reverted to previous tested rsync version (3.0.9) after receiving many user bug reports that the newest rsync version (3.1.2) fails on some older Android kernels. Some users of a prior version may need to fully uninstall and reinstall SSHelper to enable the above-described rsync binary version change.
- 05.05.2017 Version 8.8. Updated included rsync binary to the most recent version, to support new features.
- 04.19.2017 Version 8.7. Changed development environments (from Eclipse to Android Studio), cleaned up many small code issues the new environment revealed.
- 04.18.2017 Version 8.6. Fixed a keyboard-response problem in the virtual terminal, added the ability to copy clipboard contents to terminal.
- 03.08.2016 Version 8.5. Updated to the most recent OpenSSL version (1.02g). This is a precautionary security update.
- 03.03.2016 Version 8.4. Corrected an important oversight and added a META header to the clipboard Web page to support UTF-8 content.
- 01.29.2016 Version 8.3. Updated OpenSSL to version 1.02f to acquire recent security-related bug fixes.
- 01.19.2016 Version 8.2. Fixed a bug in the Zeroconf class that sometimes prevented retirement of an old IP address.
- 01.18.2016 Version 8.1. Revised the Zeroconf algorithm to make it more responsive to IP changes that result from changing networks.
- 01.15.2016 Version 8.0. Updated to most recent OpenSSH version (7.1p2) in response to client bug vulnerability report in versions 5.4 - 7.1.
- 10.30.2015 Version 7.9. Fixed a bug that caused SSHelper to unceremoniously exit when another application tried to manipulate the network connection.
- 09.25.2015 Version 7.8. Updated network navigation code to use whichever network type the user has selected or has available — it's no longer limited to wireless networks. Any network type recognized by Android will also be used by SSHelper.
- 05.07.2015 Version 7.7. Updated OpenSSL to most recent version (1.02a).
- 05.05.2015 Version 7.6. Fixed a cursor-tracking bug in the terminal emulator.
- 04.24.2015 Version 7.5. Added code to update system log if HTTP log server begins serving requests, added two precautionary null-value pointer tests.
- 04.24.2015 Version 7.4. Fixed a bug that updated user interface elements when they weren't visible — this change significantly decreases SSHelper's overall system load.
- 04.17.2015 Version 7.3. Recoded the shell launch protocol for more flexibility and uniformity between user and superuser (both now read the user-level ~/.profile), fixed a bug in the text-to-speech code.
- 04.13.2015 Version 7.2. Restored color-keyed directory listings in interactive shell sessions.
- 04.13.2015 Version 7.1. Solved a longstanding bug that prevented interactive shell sessions. A side effect of this solution is that SSHelper's terminal tab works once again. Users who want the full effect of this fix (including a new default login procedure) should uninstall and reinstall SSHelper.
- 03.20.2015 Version 7.0. Security update — recompiled this project using the most recent OpenSSL library version, 1.0.2a, which fixes a number of significant vulnerabilities. After updating your copy of SSHelper, to confirm which OpenSSL version you have, initiate an SSHelper shell session and type "ssh -V".
- 02.15.2015 Version 6.9. Solved the Android 5.0 position-independent executable problem by providing two binaries, one for Android versions ≥ 5.0, which require that executables be position-independent, and versions < 4.1, which require that executables not have this feature. The installer decides which binary to use based on the Android version number.
- 10.09.2014 Version 6.8. Included more proactive safeguards against crashes.
- 09.29.2014 Version 6.7. Recoded the service notifier to reflect SSHelper's current running state.
- 09.10.2014 Version 6.6. Fixed a few small bugs in the new clipboard server feature.
- 09.09.2014 Version 6.5. Added a clipboard server that provides read/write access to the Android clipboard from any browser on the local network.
- 08.15.2014 Version 6.4. Updated to the most recent OpenSSL version (1.01i) for security purposes.
- 04.28.2014 Version 6.3. Reworked layout for better function and appearance on small displays.
- 04.11.2014 Version 6.2. This version of SSHelper incorporates the fix for the heartbleed bug in OpenSSL. After installing, to verify that your SSHelper version has the fix, issue this command: "ssh (device name or IP) ssh -V". The reply should be "OpenSSH_6.6p1, OpenSSL 1.0.1g 7 Apr 2014". Note the OpenSSL version 1.01g, which has the fix.
- 04.05.2014 Version 6.1. Corrected a user-reported bug that prevented installation in some circumstances.
- 04.05.2014 Version 6.0. Disabled debug logging to a log file inadvertently left enabled in recent changes.
- 04.04.2014 Version 5.9. Updated to the most recent version of OpenSSH, which fixes some security issues.
- 04.03.2014 Version 5.8. Added some safeguards against a user-reported NPE during installation.
- 04.02.2014 Version 5.7. Further optimized the terminal emulator, changed the cross-compilation processor identity and recompiled all the native-code binaries to avoid a potential processor conflict.
- 04.01.2014 Version 5.6. Rewrote the terminal emulator for greater speed and responsiveness. The emulator still won't work on Samsung devices with Knox installed, and a desktop shell session is more effective, but the emulator is handy at times.
- 03.30.2014 Version 5.5. Fixed configuration issue that prevented SSH compression from working.
- 03.27.2014 Version 5.4. Arranged to apply the device's user-defined name for the Zeroconf network name if it's been defined.
- 03.27.2014 Version 5.3. Revised the Zeroconf / MDNS code block to allow local-network recognition using the (device name).local addressing convention.
- 03.24.2014 Version 5.2. Changed the naming convention for Zeroconf/Bonjour hostnames to conform to prevailing standards.
- 03.03.2014 Version 5.1. Recoded a number of controls and methods to accommodate small displays like cell phones.
- 02.17.2014 Version 5.0. Assigned the Zeroconf devices more distinct names (the device model name) to help in sorting out devices on busy networks.
- 11.17.2013 Version 4.9. Gave Busybox the ability to translate Internet names into addresses (i.e. DNS). This means network-aware Busybox applets (i.e. telnet, wget, etc.) will accept host names and "do the right thing." Improved the app's overall performance through fine tuning.
- 11.13.2013 Version 4.8. Fixed an error in the path assignment sequence that would have prevented a remote "scp" invocation from functioning correctly.
- 11.12.2013 Version 4.7. Changed the shell launch code in response to user reports, with the aim of making SSHelper function with as many Android devices and OS versions as possible.
- 11.12.2013 Version 4.6. Revised the user/superuser launch code in response to user reports, optimized the HTTP server to run faster so log displays don't flicker, changed the default search path to accommodate a wider array of Android devices.
- 11.11.2013 Version 4.5. Improved the default shell environment and how it's launched. Added more environment variables to tune shell sessions.
- 11.11.2013 Version 4.4. Fixed a reported logon bug, rewrote the HTTP server for more responsiveness, cleaned up other small bugs.
- 11.10.2013 Version 4.3. Remapped the binary directory, changed the superuser setup, decided to use the Busybox shell (color-coded directory listings etc.), arranged that the configuration file ".profile" is always read in both user and superuser modes.
- 11.09.2013 Version 4.2. Recoded the superuser launch routine for greater compatibility with different rooting packages.
- 11.09.2013 Version 4.1. Added color display to the activity log, added an option to copy the log to the system clipboard, increased the number of explanatory dialogs, recoded the superuser launch procedure.
- 11.08.2013 Version 4.0. Revised the logging facility to show either the SSH server events or the Android "logcat" output, both with selectable levels of detail.
- 11.07.2013 Version 3.9. Refactored some code to accommodate different root packages as part of the superuser feature.
- 11.06.2013 Version 3.8. Made small changes to accommodate superuser access on a rooted Android device. These changes have no effect on normal activities, but to apply the changes, users need to fully uninstall and reinstall SSHelper.
- 11.05.2013 Version 3.7. Fixed the Zeroconf registration code to avoid multiple registrations.
- 11.05.2013 Version 3.6. Recoded the full-shutdown option, which had stopped working during recent changes.
- 11.05.2013 Version 3.5. Fixed an error in ssh-keygen that would have prevented automatic key generation.
- 11.05.2013 Version 3.4. Cleaned up the background service code so only selected servers run at boot without an activity present, changed some default values.
- 11.04.2013 Version 3.3. Finally located and fixed a bug that prevented public-key (passwordless) logons for some users. To get this change, users must fully uninstall, then reinstall, SSHelper.
- 11.03.2013 Version 3.2. Modified installation code to address a resource overuse, changed default configuration to deal with reported problems with public-key logins.
- 11.03.2013 Version 3.1. Improved the log web page, cleaned up a few small bugs, added an option to enable/disable strict modes in the SSH login protocol, to allow imperfectly configured clients to use public-key (passwordless) logins.
- 11.01.2013 Version 3.0. Added a special debugging mode that provides extra data useful for analyzing server problems. This change has no effect on normal SSHelper operations but, when activated, is very useful in analyzing Secure Shell server/client problems.
- 10.31.2013 Version 2.9. Fixed an error condition that could result in an ANR (Application Not Responding), restored the status notification's ability to launch the activity.
- 10.30.2013 Version 2.8. Added ECDSA key generation to the setup procedure. SSHelper now creates host RSA, DSA and ECDSA keys to maximize operational flexibility.
- 10.27.2013 Version 2.7. Decided to generate both types of SSH keys during installation — DSA and the older RSA type as well. Some users may expect to be able to use RSA out of the box, and my not generating this key type in the new SSHelper version was an oversight.
- 10.27.2013 Version 2.6. Added more error traps after testing revealed some unmanaged border conditions.
- 10.27.2013 Version 2.5. Coded some more precautionary error traps based on reports from the rather slick automated Google bug reporting system.
- 10.27.2013 Version 2.4. Resolved a number of user-reported issues — dead-end back button on the Help tab, agent forwarding, support for compression and a few others.
- 10.27.2013 Version 2.3. Rewrote the HTTP log display service, fixed a keyboard bug in the terminal applet.
- 10.27.2013 Version 2.2. Cleaned up some minor server/client issues, added an HTTP server for remote log display.
- 10.26.2013 Version 2.1. Solved a secure-login environment path problem.
- 10.22.2013 Version 2.0. Major upgrade: 1. Replaced Dropbear with OpenSSH for much better reliability and consistency with accepted secure shell standards. 2. Improved the built-in terminal, which now provides history and line editing. 3. Added a Zeroconf broadcast, so SSHelper tells your local network its address and what services it has to offer.
- 01.08.2013 Version 1.8. On user request, added Android WRITE_MEDIA_STORAGE permission to the set of permissions, even though this doesn't seem to work on a non-rooted Android device at present, in the hope that someone in Android development will get the message and enable this permission.
- 04.21.2012 Version 1.7. Fixed a problem with the start-at-boot option.
- 02.23.2012 Version 1.6. Fixed several bugs that crept in after the change to Android ICS, all of which revolved around AsyncTask threads, which are becoming increasingly unreliable, so changed to ordinary threads in some cases.
- 11.16.2011 Version 1.5. Fixed a bug in the service initialization code.
- 11.15.2011 Version 1.4. Revised the service code again, for greater robustness.
- 11.15.2011 Version 1.3. Revised the background service launch method to keep Android from stopping it.
- 11.12.2011 Version 1.2. Rewrote code to avoid leaking the Text-To-Speech resource.
- 11.02.2011 Version 1.1. Released updated package after realizing I only support Android API 13 and above.
- 11.01.2011 Version 1.0. Initial Public Release.
| Home | | Android | | | | Share This Page |

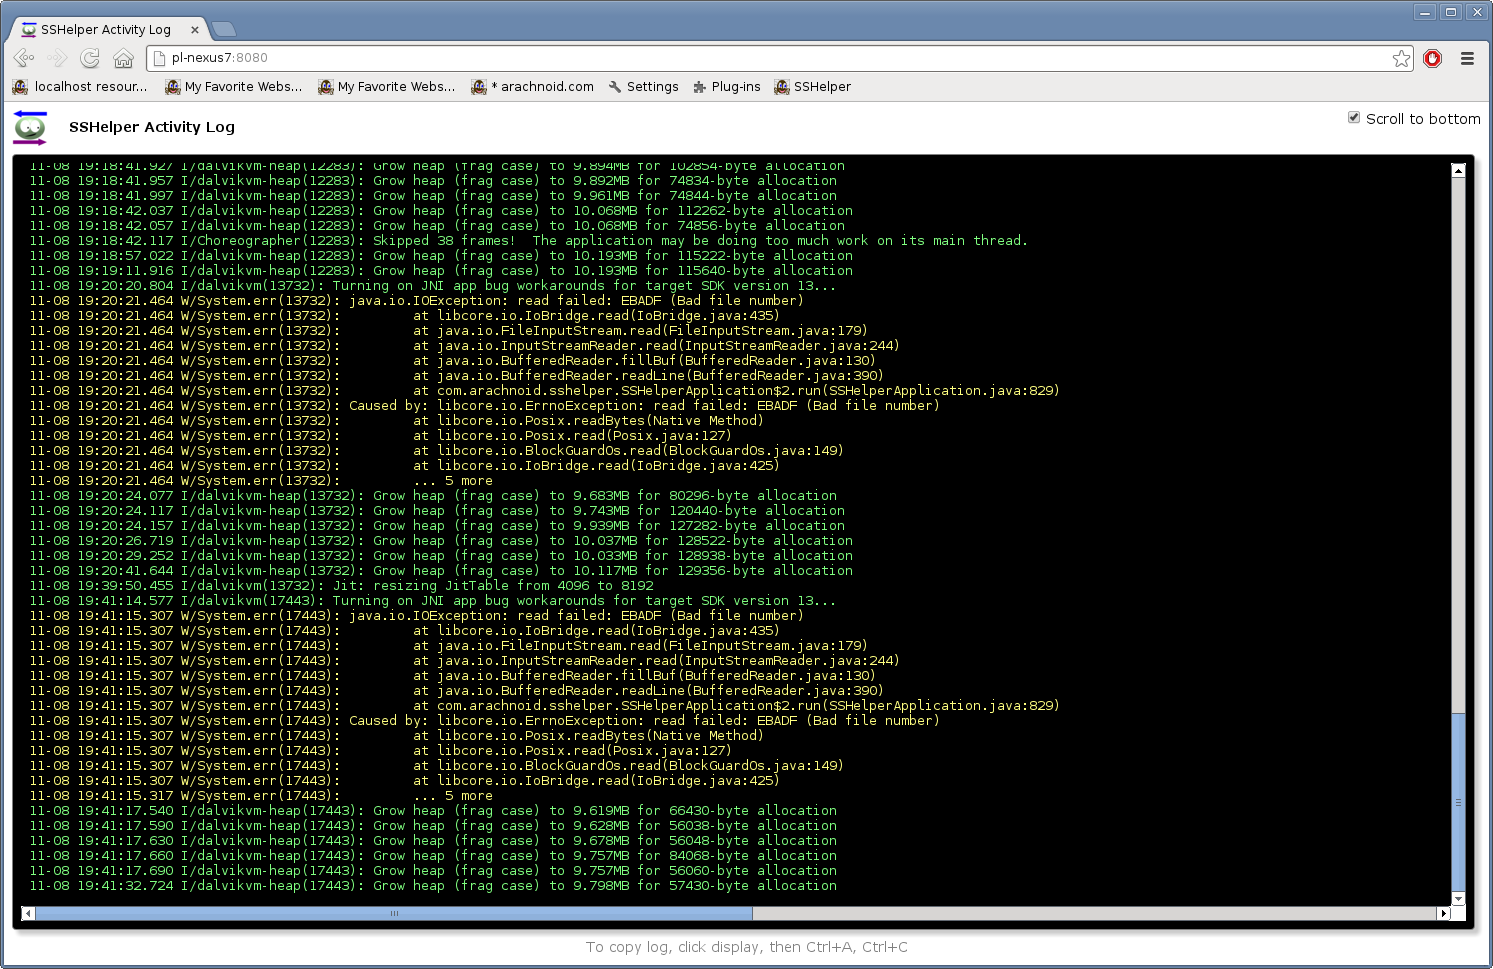
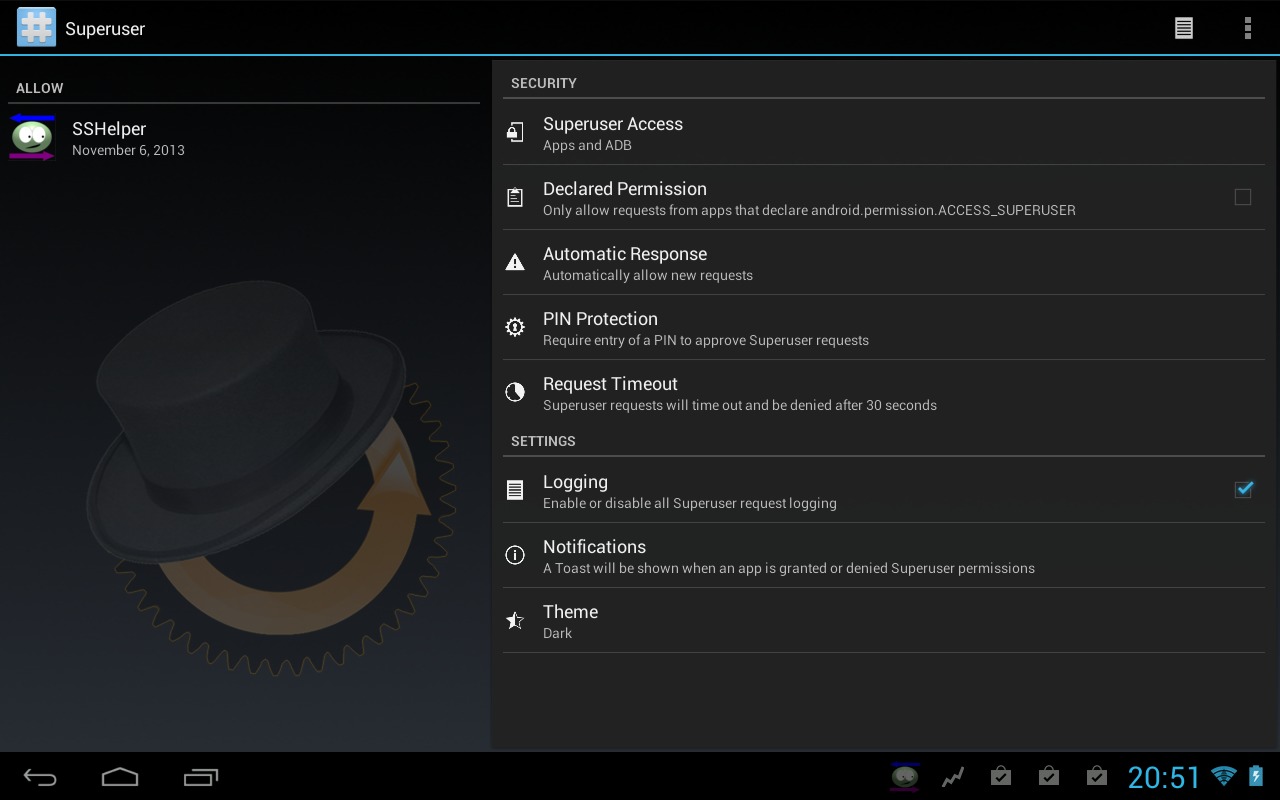
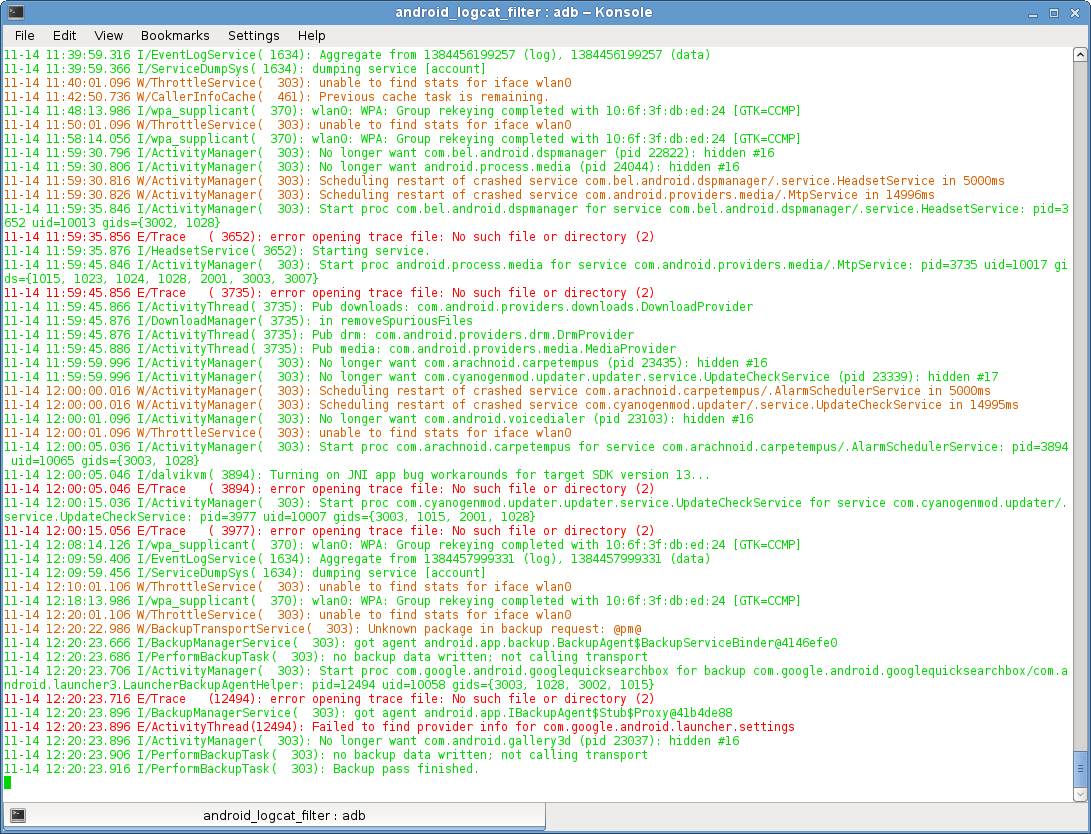